


I got my first digital oscilloscope today, Ended up going with a Rigol DS1052E which seems to get great reviews around the net for a cheap scope. At about $400 it’s not the cheapest one around, but also far from the most expensive. I would say my tipping point was David’s teardown over on eevblog.com where he found exceptional build quality. I’m not going to do a full review, there are plenty of people who have done that, there is probaly more infomation on this scope on the internet then any other.
The need which finally pushed me over the edge to pickup a DSO was that in my datalogger project I had started to run into memory limitations with the atmega328 chip I was using and started l attempting to get the arduino boot loader onto an atmega1248 which has 16k of SRAM, 8x more hen the 328. I was able to optimize my code enough on the current project that it ended up not being nessary, but I am still playing with the 1284. There is a great thread over at arduino.cc almost all my work is based on this thread. One major difference from my implementation from the others on the form is that because I am intending to run the processor at 3.3v I need to run the uC at 8mhz as opposed to the more typical 16 or 20mhz that others use at 5v Vcc. I am currently at the point where I can compile sketches in the arduino IDE and manually load them to the chip,and they run, but loading them automatically through the IDE to the bootloader is not.

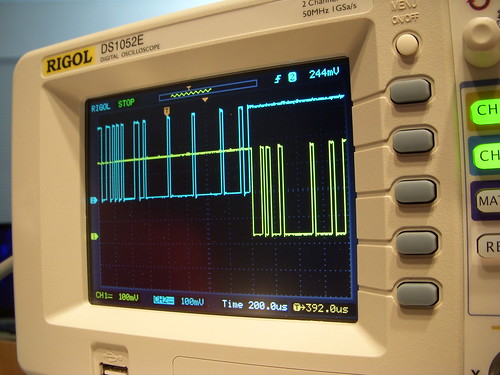
I was initially having issues with getting the UART to clock on the right baud rate so that it could understand and respond to the computer. The scope was a nice help in fixing the capacitance issue I had to bring the clock to where it needed to be, then to verify that the UART is communicating.
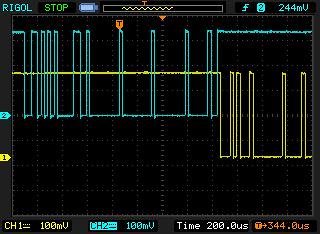
The nice thing with a DSO is being able to record a signal that is short and non-repetitive, and keep that signal on the scope for further analyse. So triggering on the TX line of the computer, allows me to see the input from the computer, then the uC response. Comparing the width of the single stop bit at the end of the transmissions allows a rough idea of the baud rate. mainly I was just looking for two to be similar, which they were.
If I ever get the atmega1284 working as a proper arduino I will do a separate post all about it, but for now it’s just a side project.
