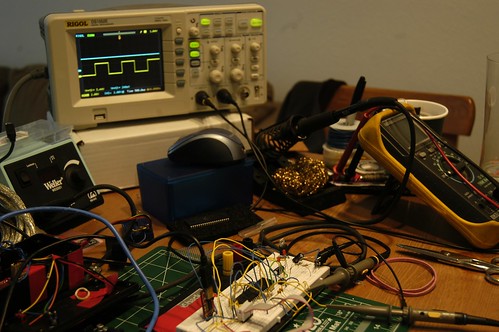
When I was running into some issues of running out of sram on the atmega 328 I started to look at alternative chips, unfortunally the next chip up in the standard line is the atmega 2560 that is used in the Arduino Mega. Since I was focusing on sram i was mainly concentrating on that aspect for my next chip. The 2560 has 8k sram, which is nice ( compared to the 2k in the 328 ) but I saw the 1284P which has 16k. Before ordering some i looked around to see if anyone had put a arduino bootloader on it, and there were a number of people tinkering with them on the arduino.cc forms so I went for it.
The main issue I was running into was that everyone on the forms wanted to run their chips at 16mhz or 20mhz, way faster then the 8mhz I use. So, this ment no using or even trying the .hex files posted by others. It was pretty clear from this thread, that the direction to go would be a modified Sanguino bootloader. The Sanguino project is a modified arduino stack ( bootloader and wireing library ) for the atmega644 which is the same class of processors and is pin compatible with the 1284.
I had the timing issues with the clock change sorted out pretty early, but was still having issues getting the bootloader to write code into the flash. I could see code going from serial, to buffer, to page buffer, but the page just wasn’t being written by SPM into flash. I believe my main issue was the calculation of where the boot section actually started. When you look at the fuse descriptions they tell you where the boot section should start. For example I am using a 2048 word boot section. What they don’t make clear is that the address they give you ( 0xF800 ) is in words as well, then when you specify the load point to avrdude it is in bytes. This is probably something I should have found sooner, epically since this is the main problem referenced on the forms. So, when you load your application into the wrong section say 0x7C00 it will still run ( assuming your chip is otherwise blank ) since it is the first instruction in memory, but when it hit the SPM call, it will fail since SPM is only allowed in the bootloader section.
Here is the files that ended up working for me, see the form above for where they came from:
UPDATE: Broken Links fixed.


Thanks for fixing the broken links. The bootloader I have seems to get out of sync when uploading. I’ll give this one a try and hope that fixes the problem.
Is there a problem if I change the Makefile to use a 16MHz oscillator?
probably will work, you may need to change the clock fuse bits
Hi,
The links seem to be broken again!
Will this work for both the DIP and TQFP versions of the mcu?
Also are both uarts of the 1284 available for use with the arduino IDE?
Thanks,
Mark
Package doent matter just pat attention to the arduino pin to port mapping rather then physical pin number. Both serial ports do work!
I’ll check the links.
Links look good, I don’t think s3 does any region blocking but ill have someone check from the UK today to make sure because I an using s3 servers in US-EAST only.
Thanks for the reply, the links still seem broken for me, I will try from home this evening in case it is my connection at work.
Managed to download the files from home, do you have a boards file for the arduino IDE for this boot loader?
See here: http://ryanmsutton.com/2011/11/updated-dev-enviroment/ I did find one bug so far in the core dealing with hardware SPI, hoping to get a updated package built this weekend.
I’m not 100% sure the burning of the bootloader works from the IDE as I didn’t test that, but it should.
I’m hoping the sanguino team will merge some of my fixes into the release but I’m having a tough time contacting them.
Thanks Ryan,
I read your other post as suggested and downloaded the 023 version, I dropped the sanguino folder in my hardware folder and fired up Arduino IDE, in the board selection it gave me 2 additional options sanguino 644 and 1284 16Mhz but no 8Mhz option even though I can see it in the boards.txt file the IDE doesn’t seem to pick it up, I did try buying the 16Mhz version and it worked, I must admit though I am struggling to understand how to burn the 8Mhz boot loader.
Commenting out ( or deleting ) the 16mhz section should work, not sure why the 8mhz isn’t showing up. I usually use avrdude or AVRStudio directly to upload bootloaders. What ISP are you using? What OS?
Found the issue was a quick fix, new version posted here: http://ryanmsutton.com/2011/12/dev-environment-r2/
Ryan,
I am using an avrisp MK2 but I only got it 2 days ago and I am still to learn avrdude and the other tools. I run osx and windows.
Do you have the avrdude command to upload direct? would be helpful then I can try and disect it to understand how it works.
I look forward to giving your latest update a go this weekend and let you how I get on, will I have to stick with 023 for this version or should it work with 1.0?
Thanks,
Mark